
Installing a concrete slab is a great way to provide a solid base for a variety of structures, such as patios, driveways, walkways, and outdoor kitchens. Concrete slabs are durable, long-lasting, and can be customized to fit the needs of your project. Although installing a concrete slab may seem intimidating, the process is actually quite simple when you understand the basics. In this guide, we’ll discuss the steps required for installing a concrete slab, including calculating the right amount of concrete, preparing the area, laying the concrete, and finishing the job. With the right knowledge and tools, you can install a concrete slab successfully and start enjoying your new space.
Materials Needed for Installation
Tools
- Screwdriver
- Hammer
- Wrench
- Pliers
- Tape Measure
- Level
- Safety Equipment
Materials
- Nails
- Screws
- Bolts
- Washers
- Spacers
- Adhesive
- Caulk
- Glue
- Wire
- Fasteners
- Wall Plugs
- Cords
- Insulation
- Ventilation Accessories
- Conduit
- Brackets or Hangers
Supplies
- Painter’s Tape
- Drop Cloths
- Rags
- Putty
- Sandpaper
- Wood Fillers
- Lubricants
- Sealants
- Cleaners
- Sponges
- Brushes
- Paint and Primer
- Masking Tape
- Paper
- Pencils
- Markers
- Chalk
Preparing the Site for Installation
Clearing the Site
Before installation of any product or system, it is essential to clear the area of the site that is to be used for the installation. It is important to remove any unnecessary items such as rocks, tree stumps, and other debris that could potentially interfere with or be damaged by the installation process.
Preparing the Ground
It is important to ensure that the ground is level and stable in order to ensure that the installation is secure and safe. This can involve tamping down any loose soil, spreading gravel, and compacting the soil around the area to be used for the installation.
Setting Up the Foundation
The foundation is the most important part of the installation process. It is important to ensure that the foundation is secure and level in order to ensure that the installation is safe and secure. This can involve digging a trench around the area, laying down a concrete slab, and/or setting posts into the ground.
Installing the Equipment
Once the foundation has been set and the ground has been prepared, it is time to install the equipment. This can involve installing the necessary wiring, plumbing, and other components. It is important to ensure that all connections are secure and that the equipment is properly installed according to the manufacturer’s instructions.
Testing the System
Once the installation is complete, it is important to test the system to ensure that it is working properly. This can involve running tests on the wiring, plumbing, and other components to ensure that they are functioning as intended. It is important to ensure that any safety protocols are in place and that the system is functioning as expected.
Measurement and Layout
Measuring Tools
Rulers
Standard rulers are used to measure straight lines, angles, curves, and other shapes. They are usually made of plastic or metal and come in different sizes and lengths.
Tape Measures
Tape measures are used to measure length, width, circumference, or any other dimension of a surface or object. They are usually made of a flexible, spring-like material and come in different lengths and widths.
Calipers
Calipers are used to measure the thickness, depth, or other dimensions of an object. They are typically made of metal and come in a variety of shapes and sizes.
Levels
Levels are used to measure the levelness of a surface. They are usually made of metal and come in different sizes and shapes.
Layout Tools
Squares
Squares are used to measure angles, such as those found in miter cuts or to ensure that a surface is level. They are typically made of metal and come in a variety of shapes and sizes.
Compasses
Compasses are used to measure and draw circles or arcs. They are usually made of metal and come in different sizes and shapes.
Protractors
Protractors are used to measure angles. They are usually made of plastic or metal and come in a variety of shapes and sizes.
Triangles
Triangles are used to measure angles, such as those found in miter cuts or to ensure that a surface is level. They are typically made of metal and come in a variety of shapes and sizes.
Digging and Excavation
Purpose of Digging and Excavation
Digging and excavation are often necessary for a variety of projects, from creating foundations for new structures to providing access to underground utilities and resources. By removing the earth and soil, workers are able to dig deeper in order to access the resources and utilities necessary for a successful project.
Process of Digging and Excavation
The process of digging and excavation involves a number of steps: • Planning: The first step is to plan the excavation, including determining the type of material to be removed, the size and shape of the hole, the depth of the excavation and any other details that need to be considered.
Site Prep: Once the plan has been established, the site needs to be prepared for the excavation by removing any existing structures, trees, or other obstacles.
Excavation: The next step is to actually begin the excavation. This is done using heavy machinery such as backhoes, bulldozers, and other equipment.
Removal: Once the excavation is complete, the material that was removed must be disposed of or reused in some way. This can be done by hauling it away, selling it, or using it for other purposes.
Backfilling: The final step is to backfill the excavation with soil or other material in order to create a stable foundation for the project.
Benefits of Digging and Excavation
Digging and excavation offer a number of benefits for construction and other projects:
Access to Utilities and Resources: By digging and excavating, workers are able to access utilities and resources that might otherwise be inaccessible.
Safety: Digging and excavation can help to create a safer environment for workers, as it removes the potential for hazards that can be associated with certain types of earth and soil.
Cost Savings: Digging and excavation can help to reduce the overall cost of a project, as it eliminates the need to purchase materials, and reduces the amount of time and labor required.
Ground Preparation
Establishing a Building Site: Establishing a building site typically involves first obtaining any necessary permits from local authorities. This includes making sure that the site is zoned for the intended purpose and that the building meets local building codes. Furthermore, the site must be cleared of any existing vegetation and debris, as well as leveled to ensure that the foundation of the building is properly supported.
Laying the Foundation: The next step in ground preparation is to lay the foundation of the building. This typically involves pouring concrete into a prepared foundation bed, as well as setting the anchor bolts and other components that will provide the necessary support for the structure. Furthermore, it is important to ensure that the foundation is level and that the necessary drainage is in place.
Installing Utilities: After the foundation has been laid, it is important to install any necessary utilities. This includes things like water, electricity, gas, and sewer lines. This step is critical for ensuring that the building is capable of functioning properly.
Finalizing the Site: Finally, the site must be completed by laying any necessary paving, such as a driveway, sidewalk, or patio. Additionally, it is important to install any necessary landscaping and to perform any necessary soil treatments to ensure that the building is properly protected from the elements.
Installation of the Edging
Gather Necessary Tools & Materials: Gather the necessary tools and materials for the installation of edging. These will include a shovel, edging material, level, stakes and string, and a measuring tape.
Plan & Layout: Measure the area where the edging will be installed and plan out the layout. Make sure to measure twice, and stake out the area with string so that it is easier to visualize the installation.
Dig & Level: Using the shovel, begin to dig a trench along the planning. Make sure the trench is level, and use the level to check it periodically.
Install Edging Material: Once the trench is level, begin to install the edging material. Start by placing the edging along one side of the trench, and then use the level to check that it is even and level.
Secure Edging Material: Once the edging material is in place, secure it with stakes. Make sure the stakes are below the edging material, and that the edging material is level.
Fill in Trench: After the edging material has been secured, fill in the trench with the dirt that was dug out earlier. Make sure to check the level periodically.
Finishing Touches: Once the edging material is in place and the trench is filled, use a rake to level the dirt and add any decorative touches, such as stones or mulch
Installation of the Edging
Gather Necessary Tools & Materials: Gather the necessary tools and materials for the installation of edging. These will include a shovel, edging material, level, stakes and string, and a measuring tape.
Plan & Layout: Measure the area where the edging will be installed and plan out the layout. Make sure to measure twice, and stake out the area with string so that it is easier to visualize the installation.
Dig & Level: Using the shovel, begin to dig a trench along the planning. Make sure the trench is level, and use the level to check it periodically.
Install Edging Material: Once the trench is level, begin to install the edging material. Start by placing the edging along one side of the trench, and then use the level to check that it is even and level.
Secure Edging Material: Once the edging material is in place, secure it with stakes. Make sure the stakes are below the edging material, and that the edging material is level.
Fill in Trench: After the edging material has been secured, fill in the trench with the dirt that was dug out earlier. Make sure to check the level periodically.
Finishing Touches: Once the edging material is in place and the trench is filled, use a rake to level the dirt and add any decorative touches, such as stones or mulch.
Compaction
Definition of Compaction
Compaction is the process of reducing the volume of solid waste materials by eliminating voids between particles, thus making the material denser. It is a process that is often used to reduce the volume of waste materials, such as paper, plastic, metal, and food waste. Compaction is also used to reduce the amount of space needed to store these materials, as well as to reduce the costs of disposal.
Types of Compaction
Mechanical Compaction: This is the most common type of compaction, and involves the use of mechanical force to reduce the volume of solid materials. This can be done with a variety of machines, such as balers, compactors, and crushers.
Chemical Compaction: This type of compaction uses chemical agents to reduce the volume of solid materials. These agents include adhesives and polymers, which are added to the material to form a new, denser material.
Thermal Compaction: This type of compaction uses heat to reduce the volume of solid materials. Heat is applied to the material, which causes the particles to melt together and form a denser material.
Benefits of Compaction
Reduced Volume: One of the most obvious benefits of compaction is that it reduces the volume of solid materials, making it easier to store and transport.
Reduced Costs: Compaction also helps reduce the costs of disposal, as it reduces the amount of materials that need to be disposed of. This can help save money in the long run.
Improved Safety: Compaction also helps improve safety, as it reduces the risk of hazardous materials being released into the environment due to improper disposal.
Laying the Base Course
Preparation: Before laying the base course, a series of steps must be taken to ensure that the area is ready for the installation. These include removing any existing vegetation, leveling the surface, and ensuring drainage.
Materials: The materials used for the base course should be of high quality and be suitable for the purpose. This includes selecting the right type of soil, gravel, or asphalt for the base course.
Laying the Course: The base course must be laid correctly in order to ensure a strong, long-lasting surface. This involves spreading the material evenly, grading it properly, and compacting it firmly.
Finishing: Once the base course has been laid, it should be finished with a layer of asphalt or a sealant. This helps to protect it from the elements and ensure a longer lifespan.
Maintenance: Regular maintenance is required to ensure that the base course remains in good condition. This includes inspecting it for any signs of damage or wear and tear, as well as repairing any areas that need it.
Leveling the Base Course
Identifying the Site
- Understanding the size and shape of the area to be leveled
- Analyzing the local terrain and soil type
- Determining the depth of the leveling needed
Establishing a Reference Point
- Using a total station or digital level to establish a starting point
- Marking the exact location of the reference point
- Calculating the elevations of the surrounding points
Excavating the Soil
- Digging out the soil to the desired depth
- Checking the soil for any debris that must be removed
- Setting aside the soil to be used later for backfilling
Compacting the Base Course
- Using a roller to compact the base course of the leveled area
- Checking the base course for evenness and adjusting as necessary
- Inspecting the base course for any imperfections and correcting them
Backfilling the Area
- Using the soil set aside earlier to backfill the leveled area
- Ensuring the soil is evenly distributed over the leveled area
- Applying additional water as needed to ensure the soil is packed down properly
Finishing the Area
- Applying a layer of gravel over the leveled area
- Inspecting the area for any irregularities and making adjustments
- Adding a layer of topsoil to allow for grass or other vegetation to be planted
- Applying a layer of mulch to complete the leveling process
Laying the Reinforcement Bars
Preparation Before Laying the Reinforcement Bars
- Mark the Location of the Bars
- Measure and Cut the Bars
- Ensure Correct Spacing between the Bars
Placing the Reinforcement Bars
- Place the Bars Carefully into the Formwork
- Check the Position of the Bars
- Connect the Bars with Tie Wires
Finishing the Reinforcement
- Make Sure the Bars are Securely Tied
- Perform Necessary Adjustments
- Clean and Prep the Work Area
Pouring the Concrete
Prepping the Base
- Prepare the area for the concrete pour by removing any debris from the surface, ensuring the surface is level, and compacting the soil to create a sturdy base.
- If a gravel or sand base is being used, it must be spread evenly, tamped down, and leveled before the concrete can be poured.
- Next, the area must be marked off with string and stakes to ensure the poured concrete is the proper depth, width, and length.
Mixing the Concrete
- Concrete is typically mixed in a large drum mixer, which ensures the ingredients are blended in the proper amounts.
- Once the concrete is mixed, it must be loaded into a concrete truck and transported to the work site.
- At the site, the concrete must be unloaded from the truck, and spread evenly across the surface.
Finishing the Concrete
- To ensure the concrete is properly poured and finished, the concrete must be screeded, tamped, and floated.
- Screeding involves using a special tool to remove any excess concrete and level out the surface.
- Tamping involves using a special tool to compact the concrete and ensure the surface is smooth and level.
- Floating is the process of using a special tool to create a textured surface on the concrete.
Curing the Concrete
- After the concrete is finished and set, it must be cured.
- During the curing process, the concrete should be kept moist by covering it with a layer of plastic or wet burlap.
- This helps prevent the concrete from drying too quickly, which can cause cracking and other damage.
- The curing process should last for at least 28 days before the concrete is ready for use.
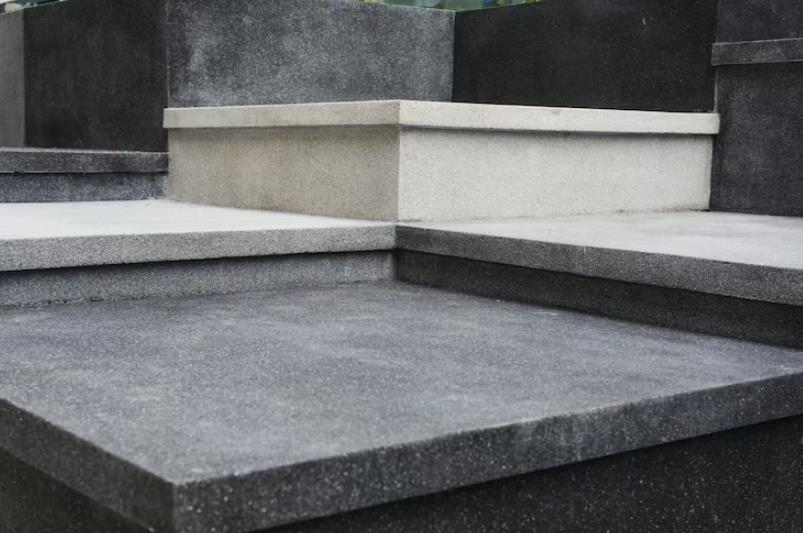
Finishing the Concrete
Preparation of the Surface
- Make sure the surface is level and free of any debris or other particles
- Remove any existing concrete with a hammer and chisel
- Make sure the surface is damp before beginning the finishing process
Applying the Finishing Compound
- Mix the finishing compound with water until it forms a thick paste
- Spread the finishing compound on the concrete surface with a trowel, using circular motions to ensure an even layer
- Allow the finishing compound to dry for at least 24 hours
Applying a Sealant
- After the finishing compound has dried, apply a sealant to the concrete surface
- Use a paintbrush to evenly spread the sealant over the entire surface
- Allow the sealant to dry for at least 24 hours before adding any vehicles or furniture
Applying a Protective Layer
- After the sealant has dried, apply a protective layer of wax or sealant over the concrete surface
- Use a paintbrush to evenly spread the protective layer over the concrete surface
- Allow the protective layer to dry for at least 24 hours before use
Troubleshooting Common Problems
Identifying the Problem:
Gather Information: Before attempting to troubleshoot any problem, it is important to have as much information as possible. This includes information about the device, such as the make, model, and age; the operating system; and any other relevant information.
Diagnosing the Problem
System Check: After gathering the necessary information, the next step is to check the system for any errors or discrepancies. This includes checking the hardware and software, as well as any settings or configurations that may have been changed.
Solving the Problem
Check the Documentation: Once the problem has been identified and diagnosed, it is important to consult the documentation for the device and software in order to find a solution.
Use Online Resources: If the documentation does not provide a solution, then it is important to search online for solutions. This could include forums, user groups, and other resources.
Troubleshooting Tools
Diagnostic Software: Diagnostic software can be used to help diagnose and troubleshoot problems. This software is often available for free or at a low cost.
System Restore: System restore allows the user to restore their system to a previous working state. This can be helpful in resolving a variety of problems.
Preventative Maintenance
Regular Backups: Regular backups are important in order to ensure that any data is not lost in the event of a problem. It is important to back up any important data on a regular basis.
Regular Updates: Regularly updating the device and software can help prevent many common problems. This includes updating the operating system, drivers, and other software.
Professional Assistance
Contact the Manufacturer: If the problem cannot be solved on one’s own, then it is important to contact the manufacturer of the device. This can help ensure that the problem is resolved quickly and efficiently.
Hire a Professional: If the problem is too complex to solve on one’s own, then it may be necessary to hire a professional. This can be costly, but it can help ensure that the problem is resolved properly.
Conclusion
The installation of a concrete slab is an important step in any building project, and it is not a task to be taken lightly. By taking the time to properly prepare the site, create the correct mix of concrete, and follow the correct installation steps, you can ensure that your concrete slab will last for many years. If the concrete slab is installed correctly, it will provide a strong foundation for whatever structure you are building, and will protect it from the elements. It is important to remember that the strength and quality of the concrete slab is only as good as the effort put into its installation. Taking the time to properly install a concrete slab is an investment that will pay off in the long run.
FAQs – Installing a Concrete Slab
1. What materials are needed for installing a concrete slab?
The materials needed for installing a concrete slab include gravel, sand, cement, reinforcing mesh, and a concrete mix.
2. How long does it take to install a concrete slab?
It typically takes 1-2 days to install a concrete slab, depending on the size of the slab and the complexity of the job.
3. What are the steps to install a concrete slab?
The steps to install a concrete slab include preparing the site, laying out the site, digging the foundation, adding a layer of gravel, laying out the reinforcing mesh, mixing and pouring the concrete, troweling and finishing the slab, and allowing the concrete to cure.
4. What are the benefits of installing a concrete slab?
Installing a concrete slab offers many benefits, including increased durability and strength, improved insulation and soundproofing, and an overall aesthetic improvement.
5. What is the cost of installing a concrete slab?
The cost of installing a concrete slab varies depending on the size of the slab, the complexity of the job, and other factors. Generally speaking, the cost of labor and materials will range from $3 to $7 per square foot.
Comments